User Instructions
User Instructions
Learn how to use the Spynamics Sacro and Spine Aligners by watching the demonstration video and follow the recommendations for use! Most important: use them daily and long term to experience the full benefits for your body.
»Note the important information about do's and dont's and precautions
at the end of this page
(scroll down)
Different Positions for different Problems:
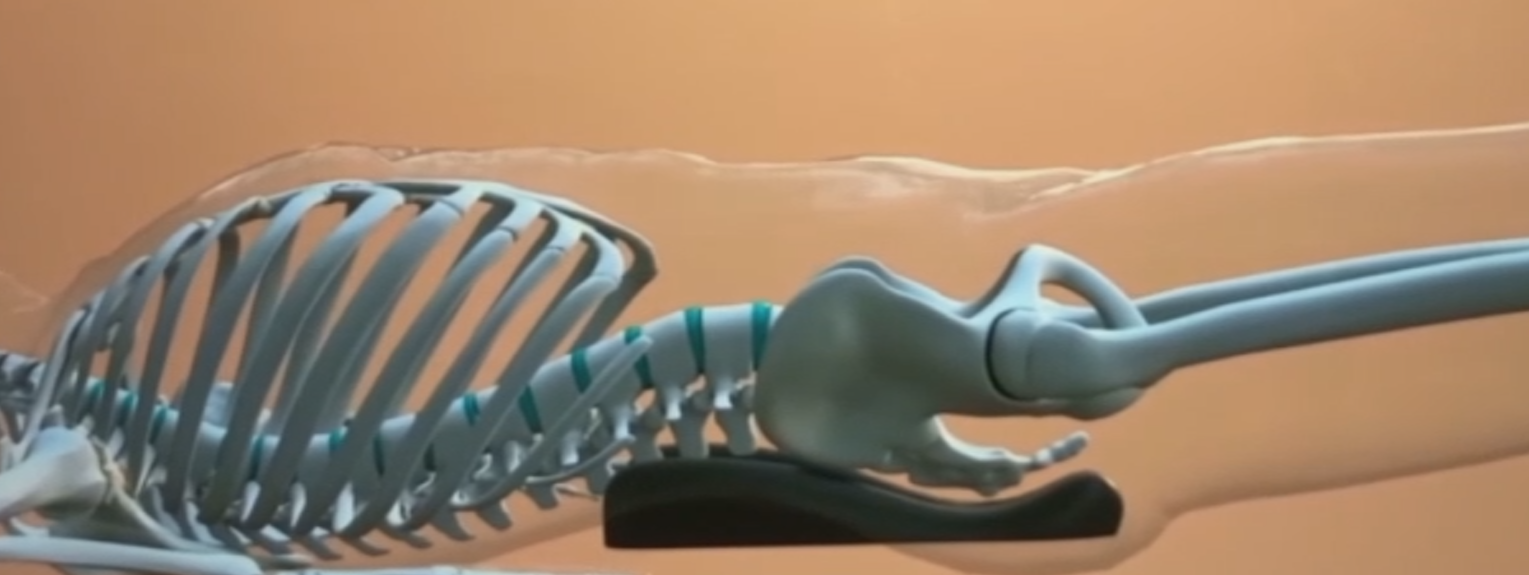
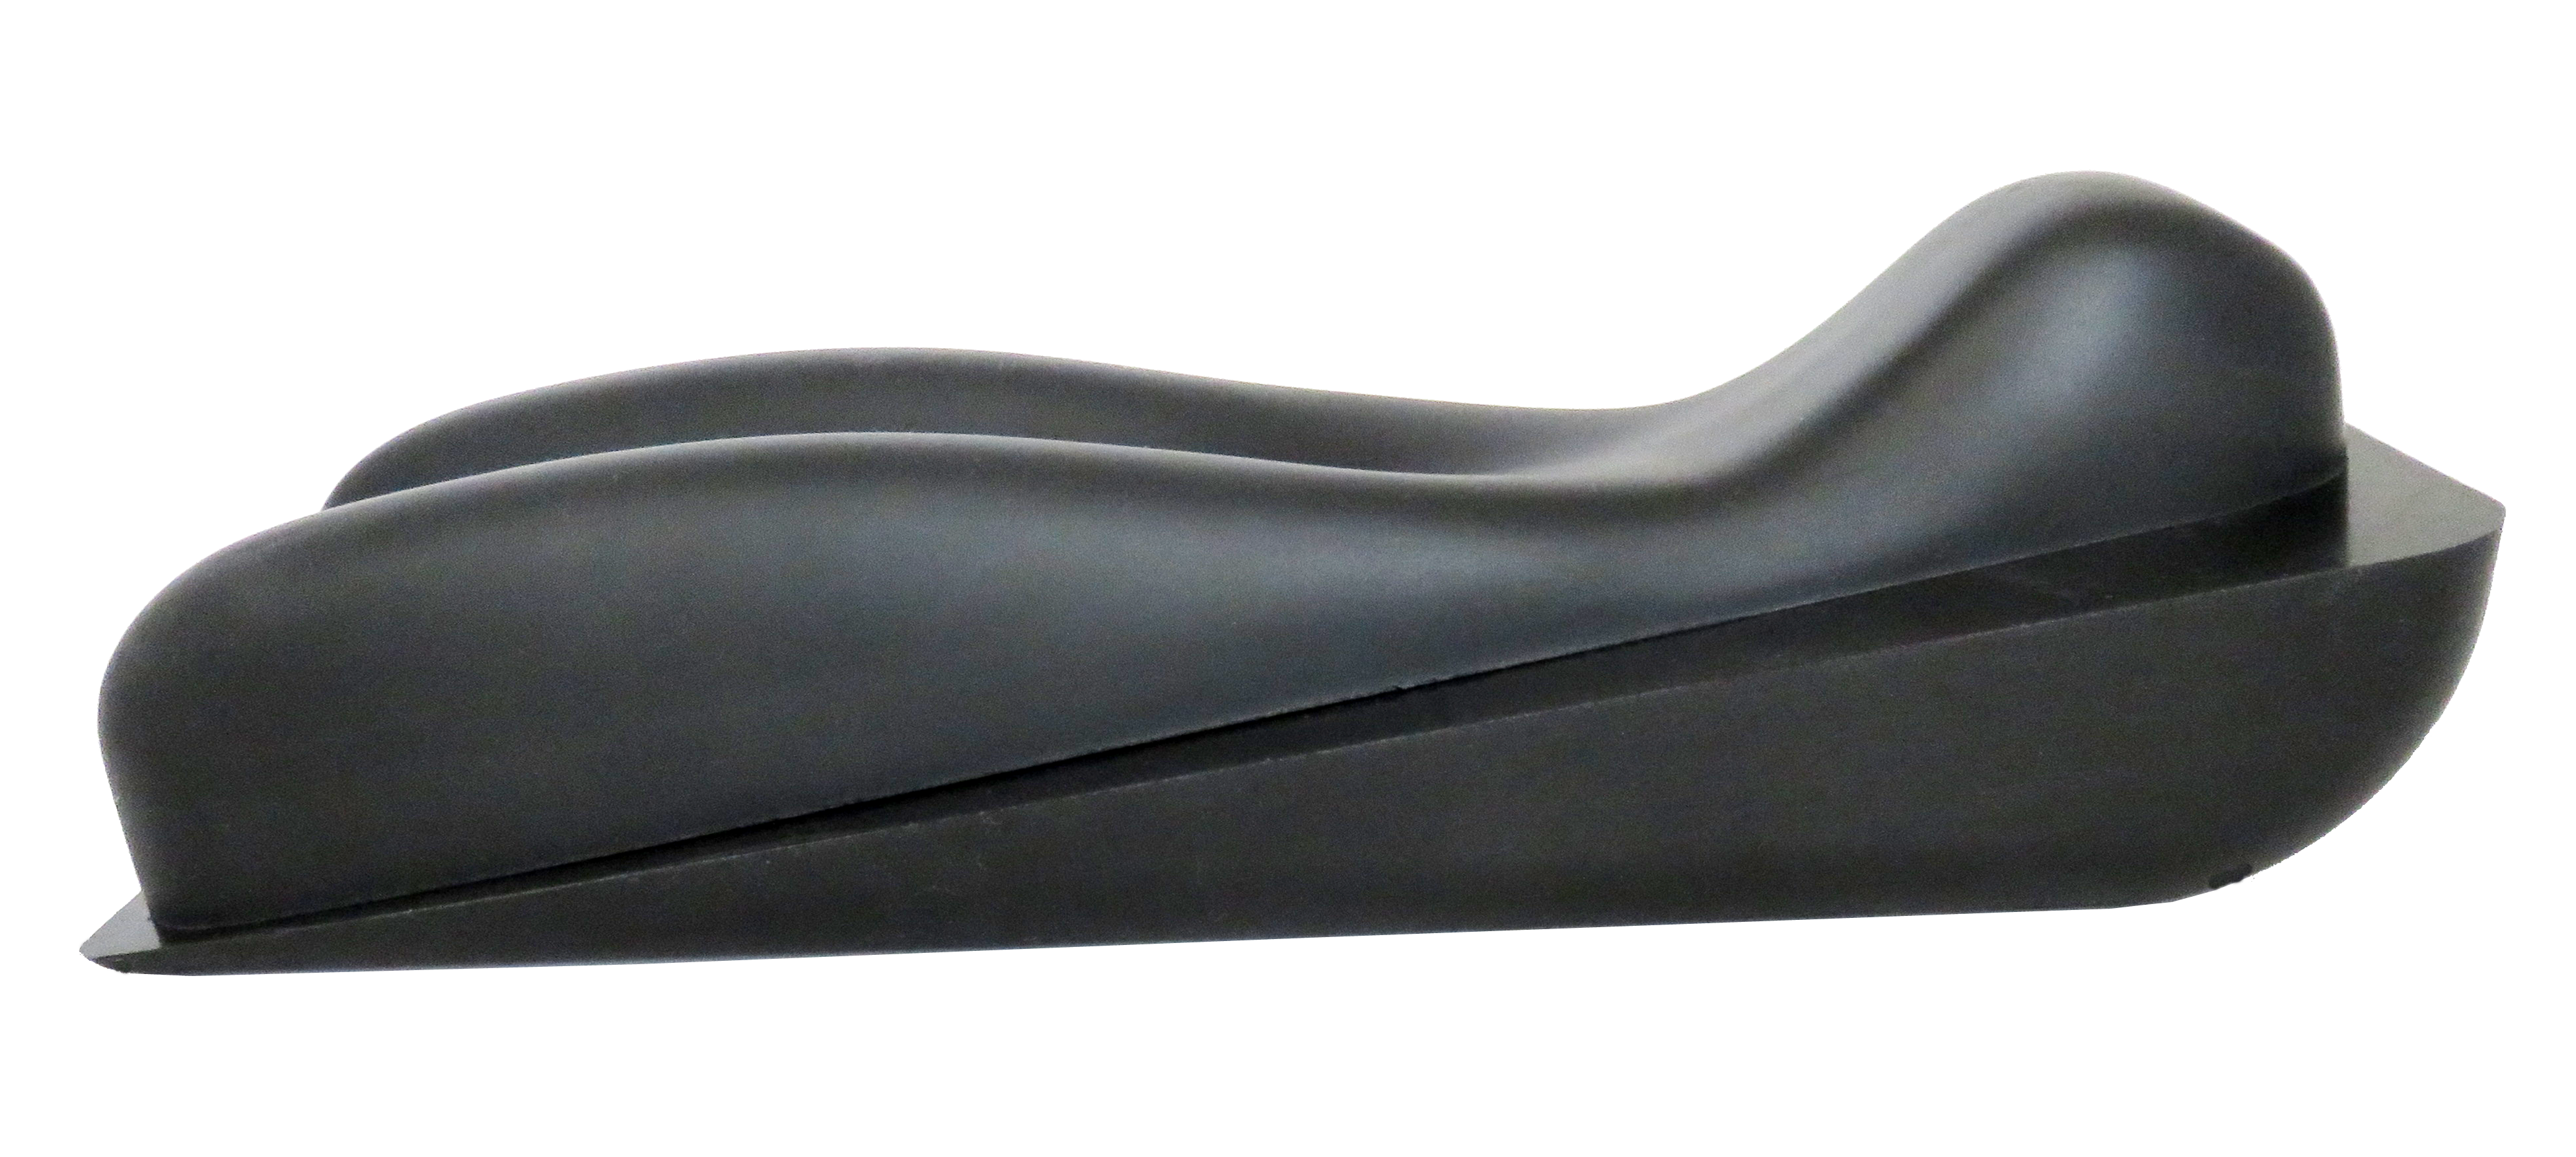
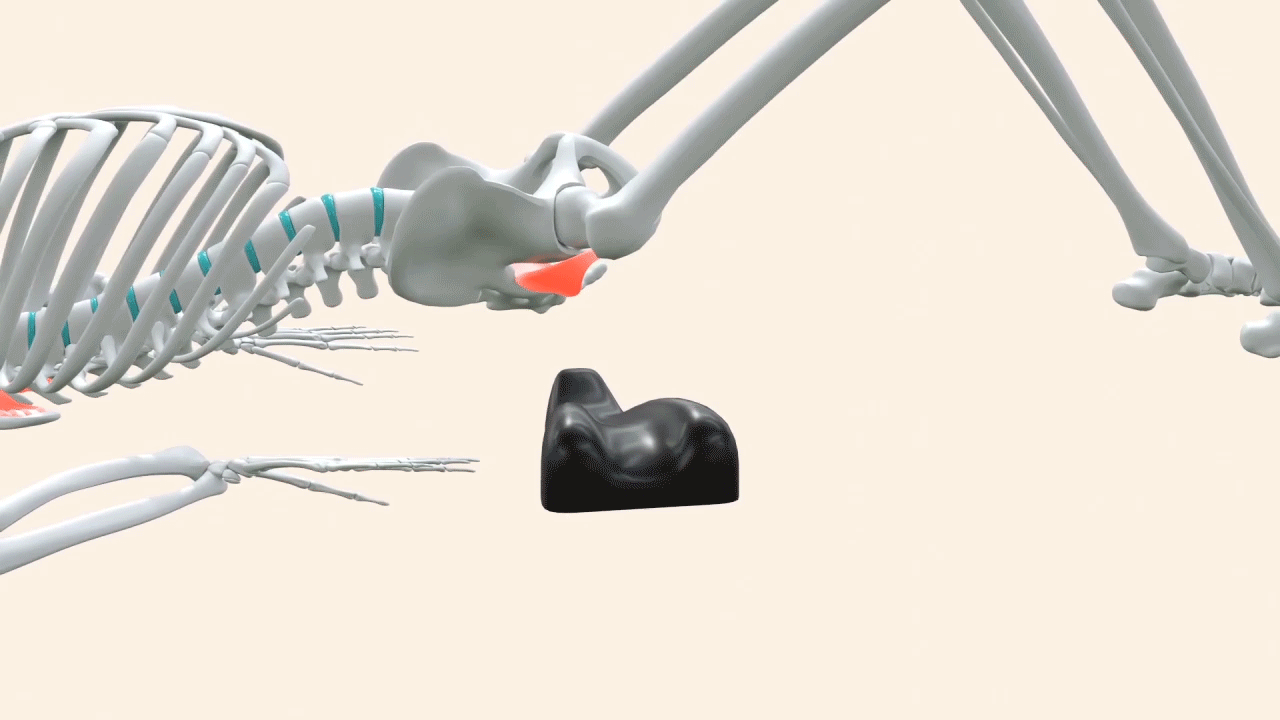
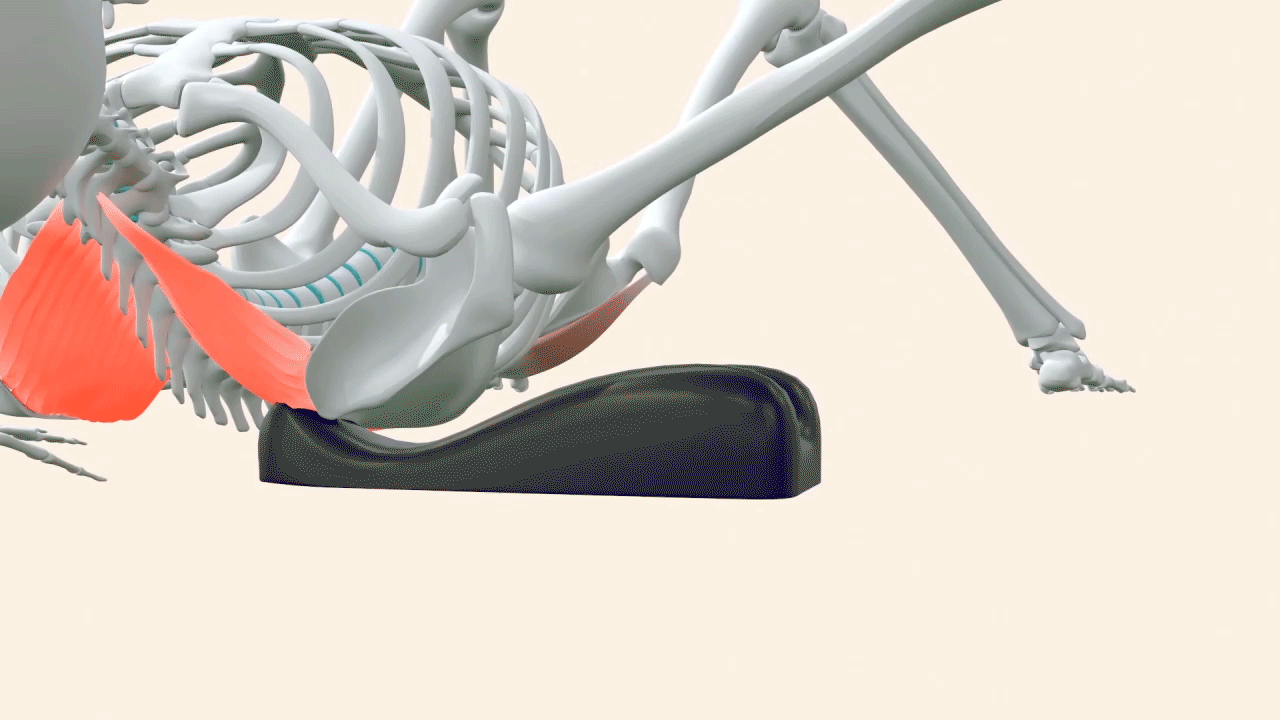
Although the Spynamics Sacro Aligner was mainly developed for the alignment of the Sacrum-Pelvis area (SIJ) there are many other different areas it can be used.
The Spynamics Spine Aligner can be used for the complete spinal column, and additionally as decompression wedge together with the Sacro Aligner.
Depending on the individual purpose of the user we recommend to start any exercise routine always at the Sacrum position followed by the other areas of problems.
Each Position should only be kept for a few moments (around 15 seconds or longer, depending on the area)
Each movement should only be done for a few moments (15 seconds or a little longer if desired) but not too long and intensive to avoid irritations.
It is recommended to do a minimum of 1 (better more) exercise sessions per day, of course more if desired.
There is no limit in how many sessions the individual user can do but it is advised to keep each session short enough to not overload the body, but long enough to achieve results.
It will usually require only around 5 minutes to cover the whole body.
Video Demonstrations:
This Video shows a complete session how to use the Spynamics Sacro Aligner and the Spynamics Spine Aligner
This video shows the basic movements for Sacrum alignment when using the Spynamics Sacro Aligner:
This video shows the basic movements for Spine alignment when using the Spynamics Spine Aligner:
More Videos at the My Pocket Osteo website: my-pocket-osteo.fr
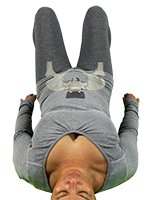
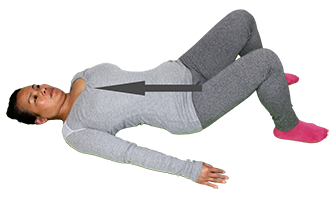
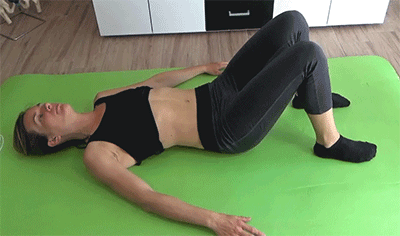
Sacrum-Pelvis Balance
1. Find the correct position
2. Make simple movements for approximately 15 seconds each. (or longer if you want!)
3. Feel the Balance
4. Continue with next body area
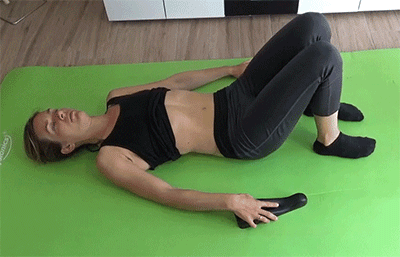
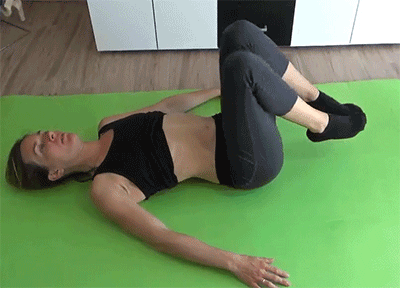
Sacrum-Pelvis Mobilization and Re-Balancing:
1. Find the correct position
2. Make simple movements (15 seconds each!)
3. Feel the Balance
Position:
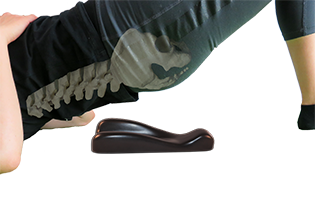
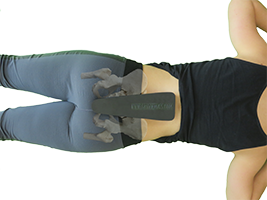
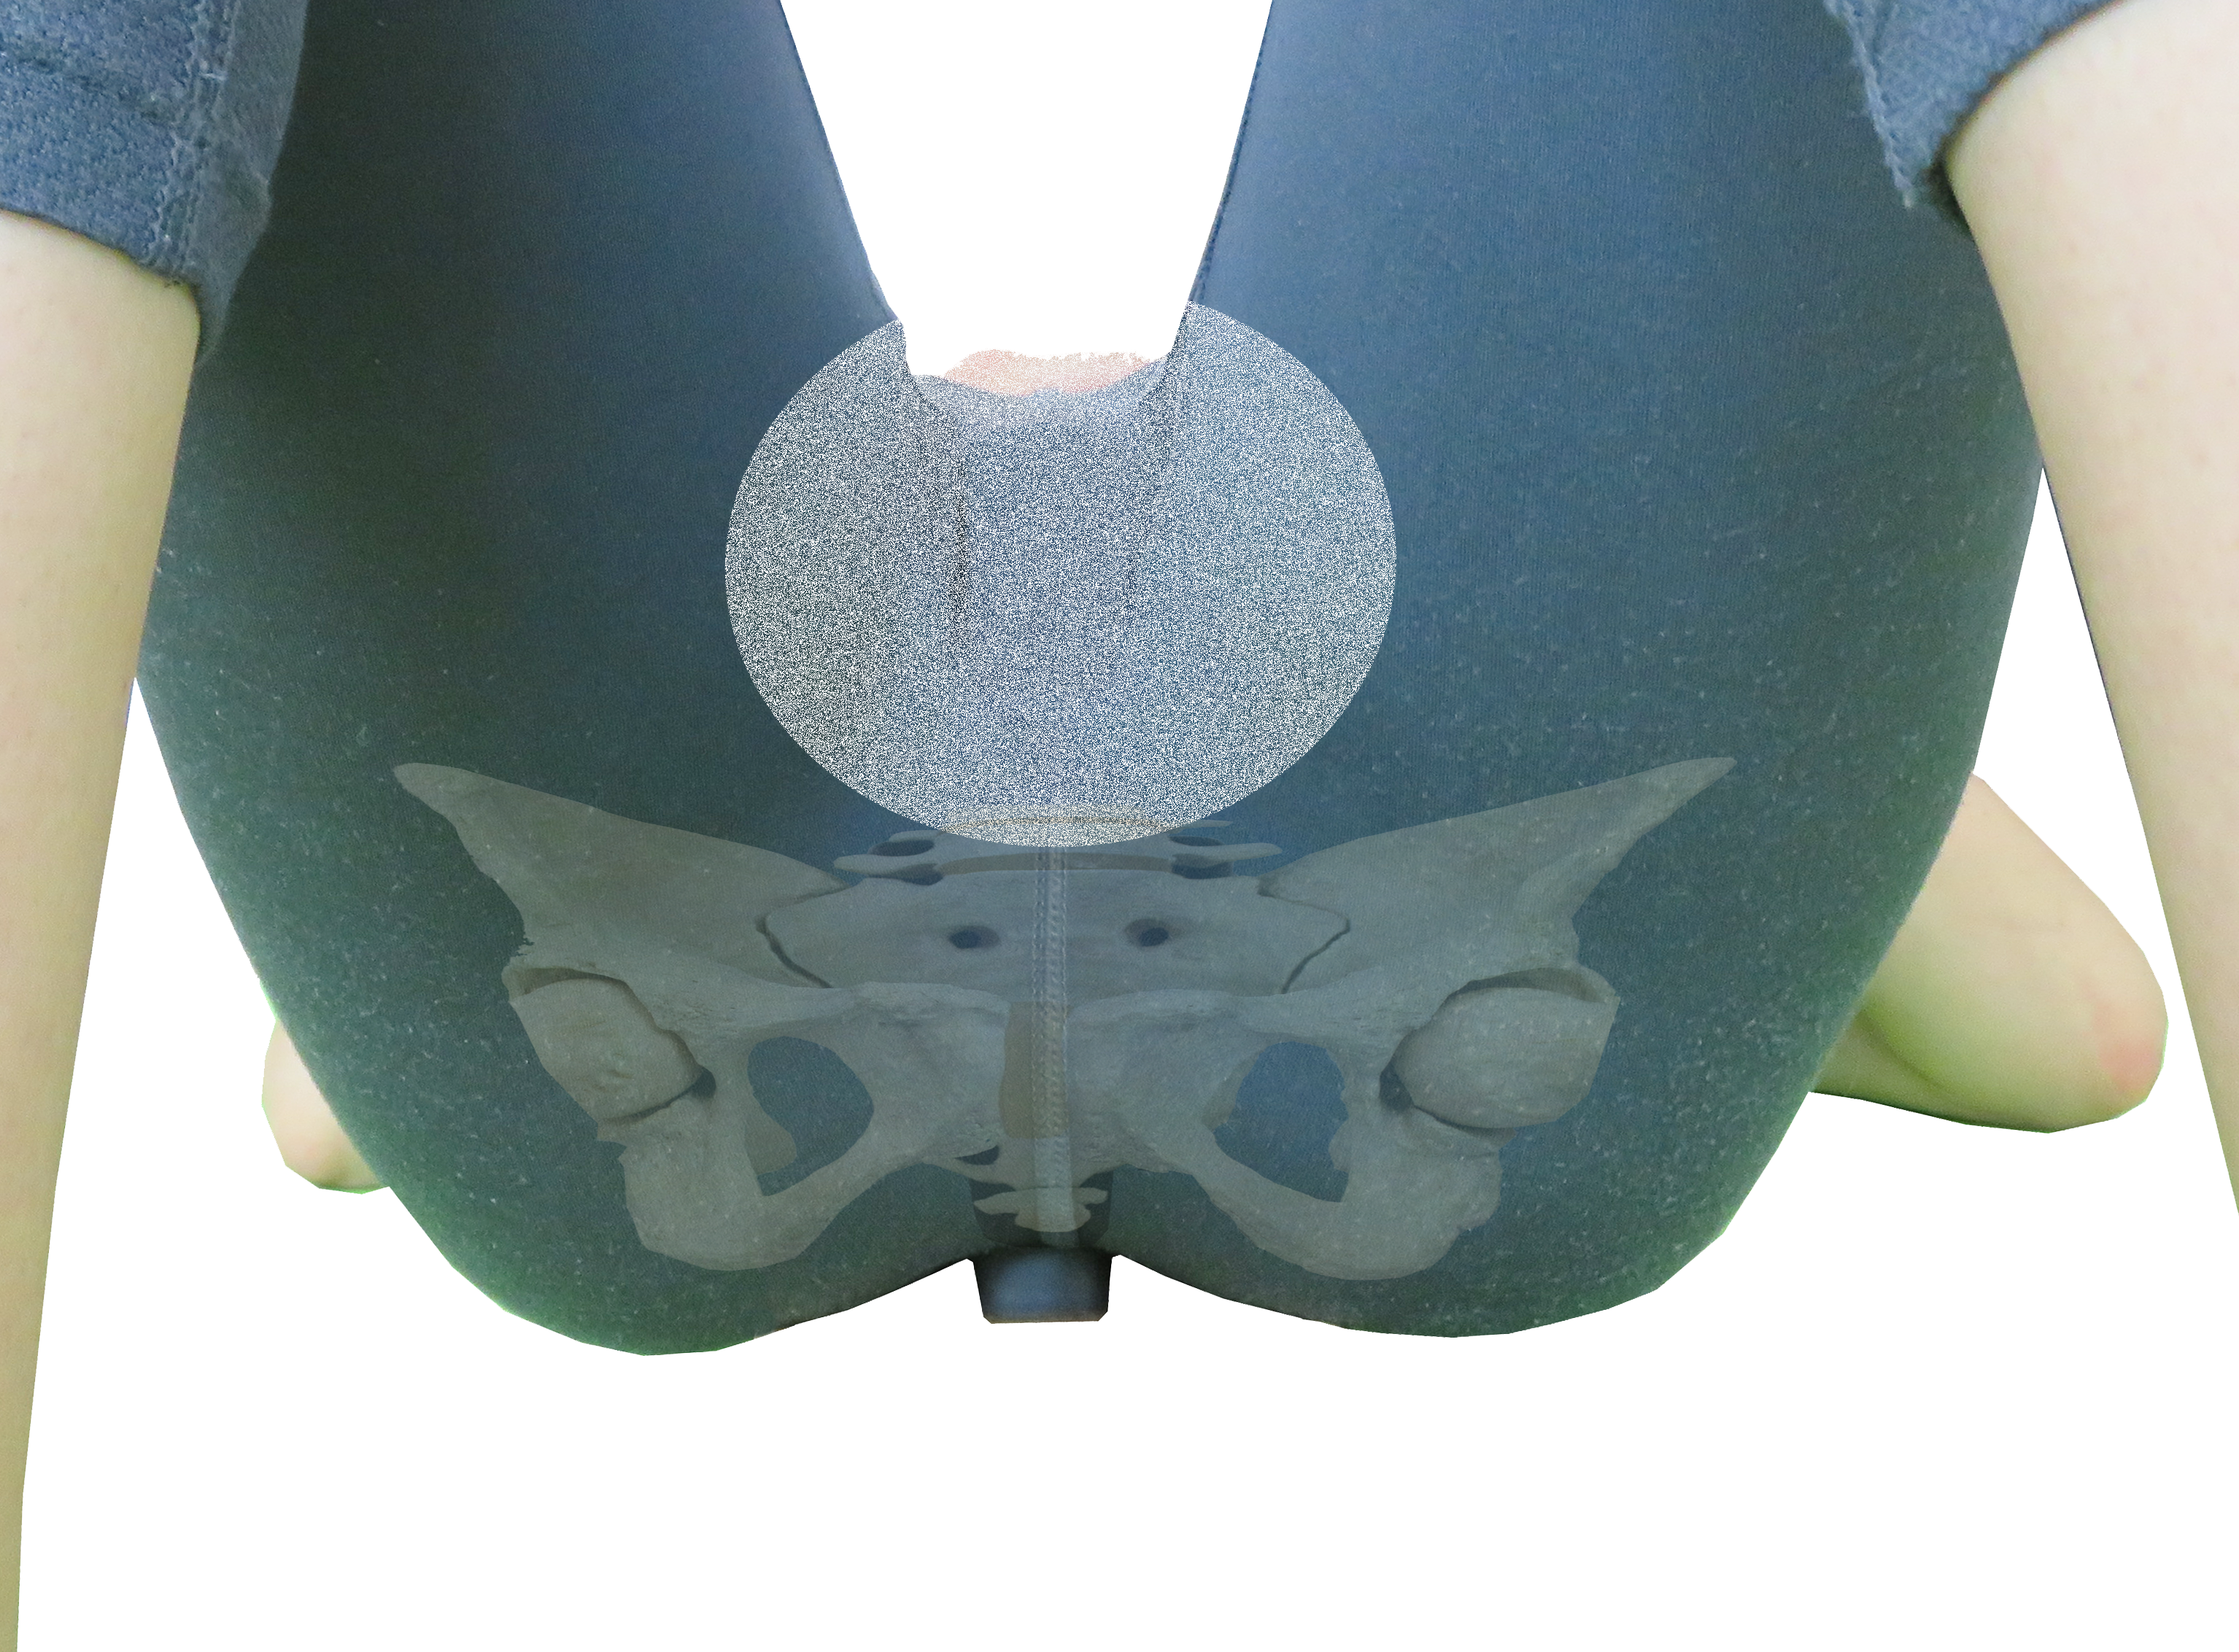
Movements:
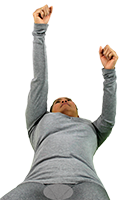
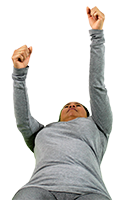
1. side to side
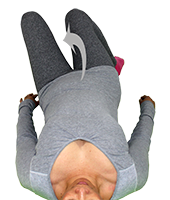
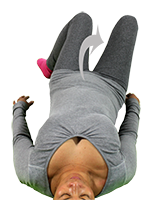
2. rocking body gently upwards-downwards
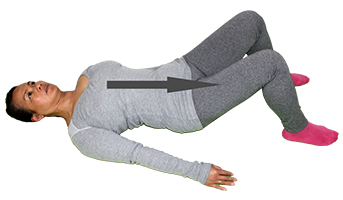
3. move legs (from the hip-joint) a little up and down (not bicycle movements)
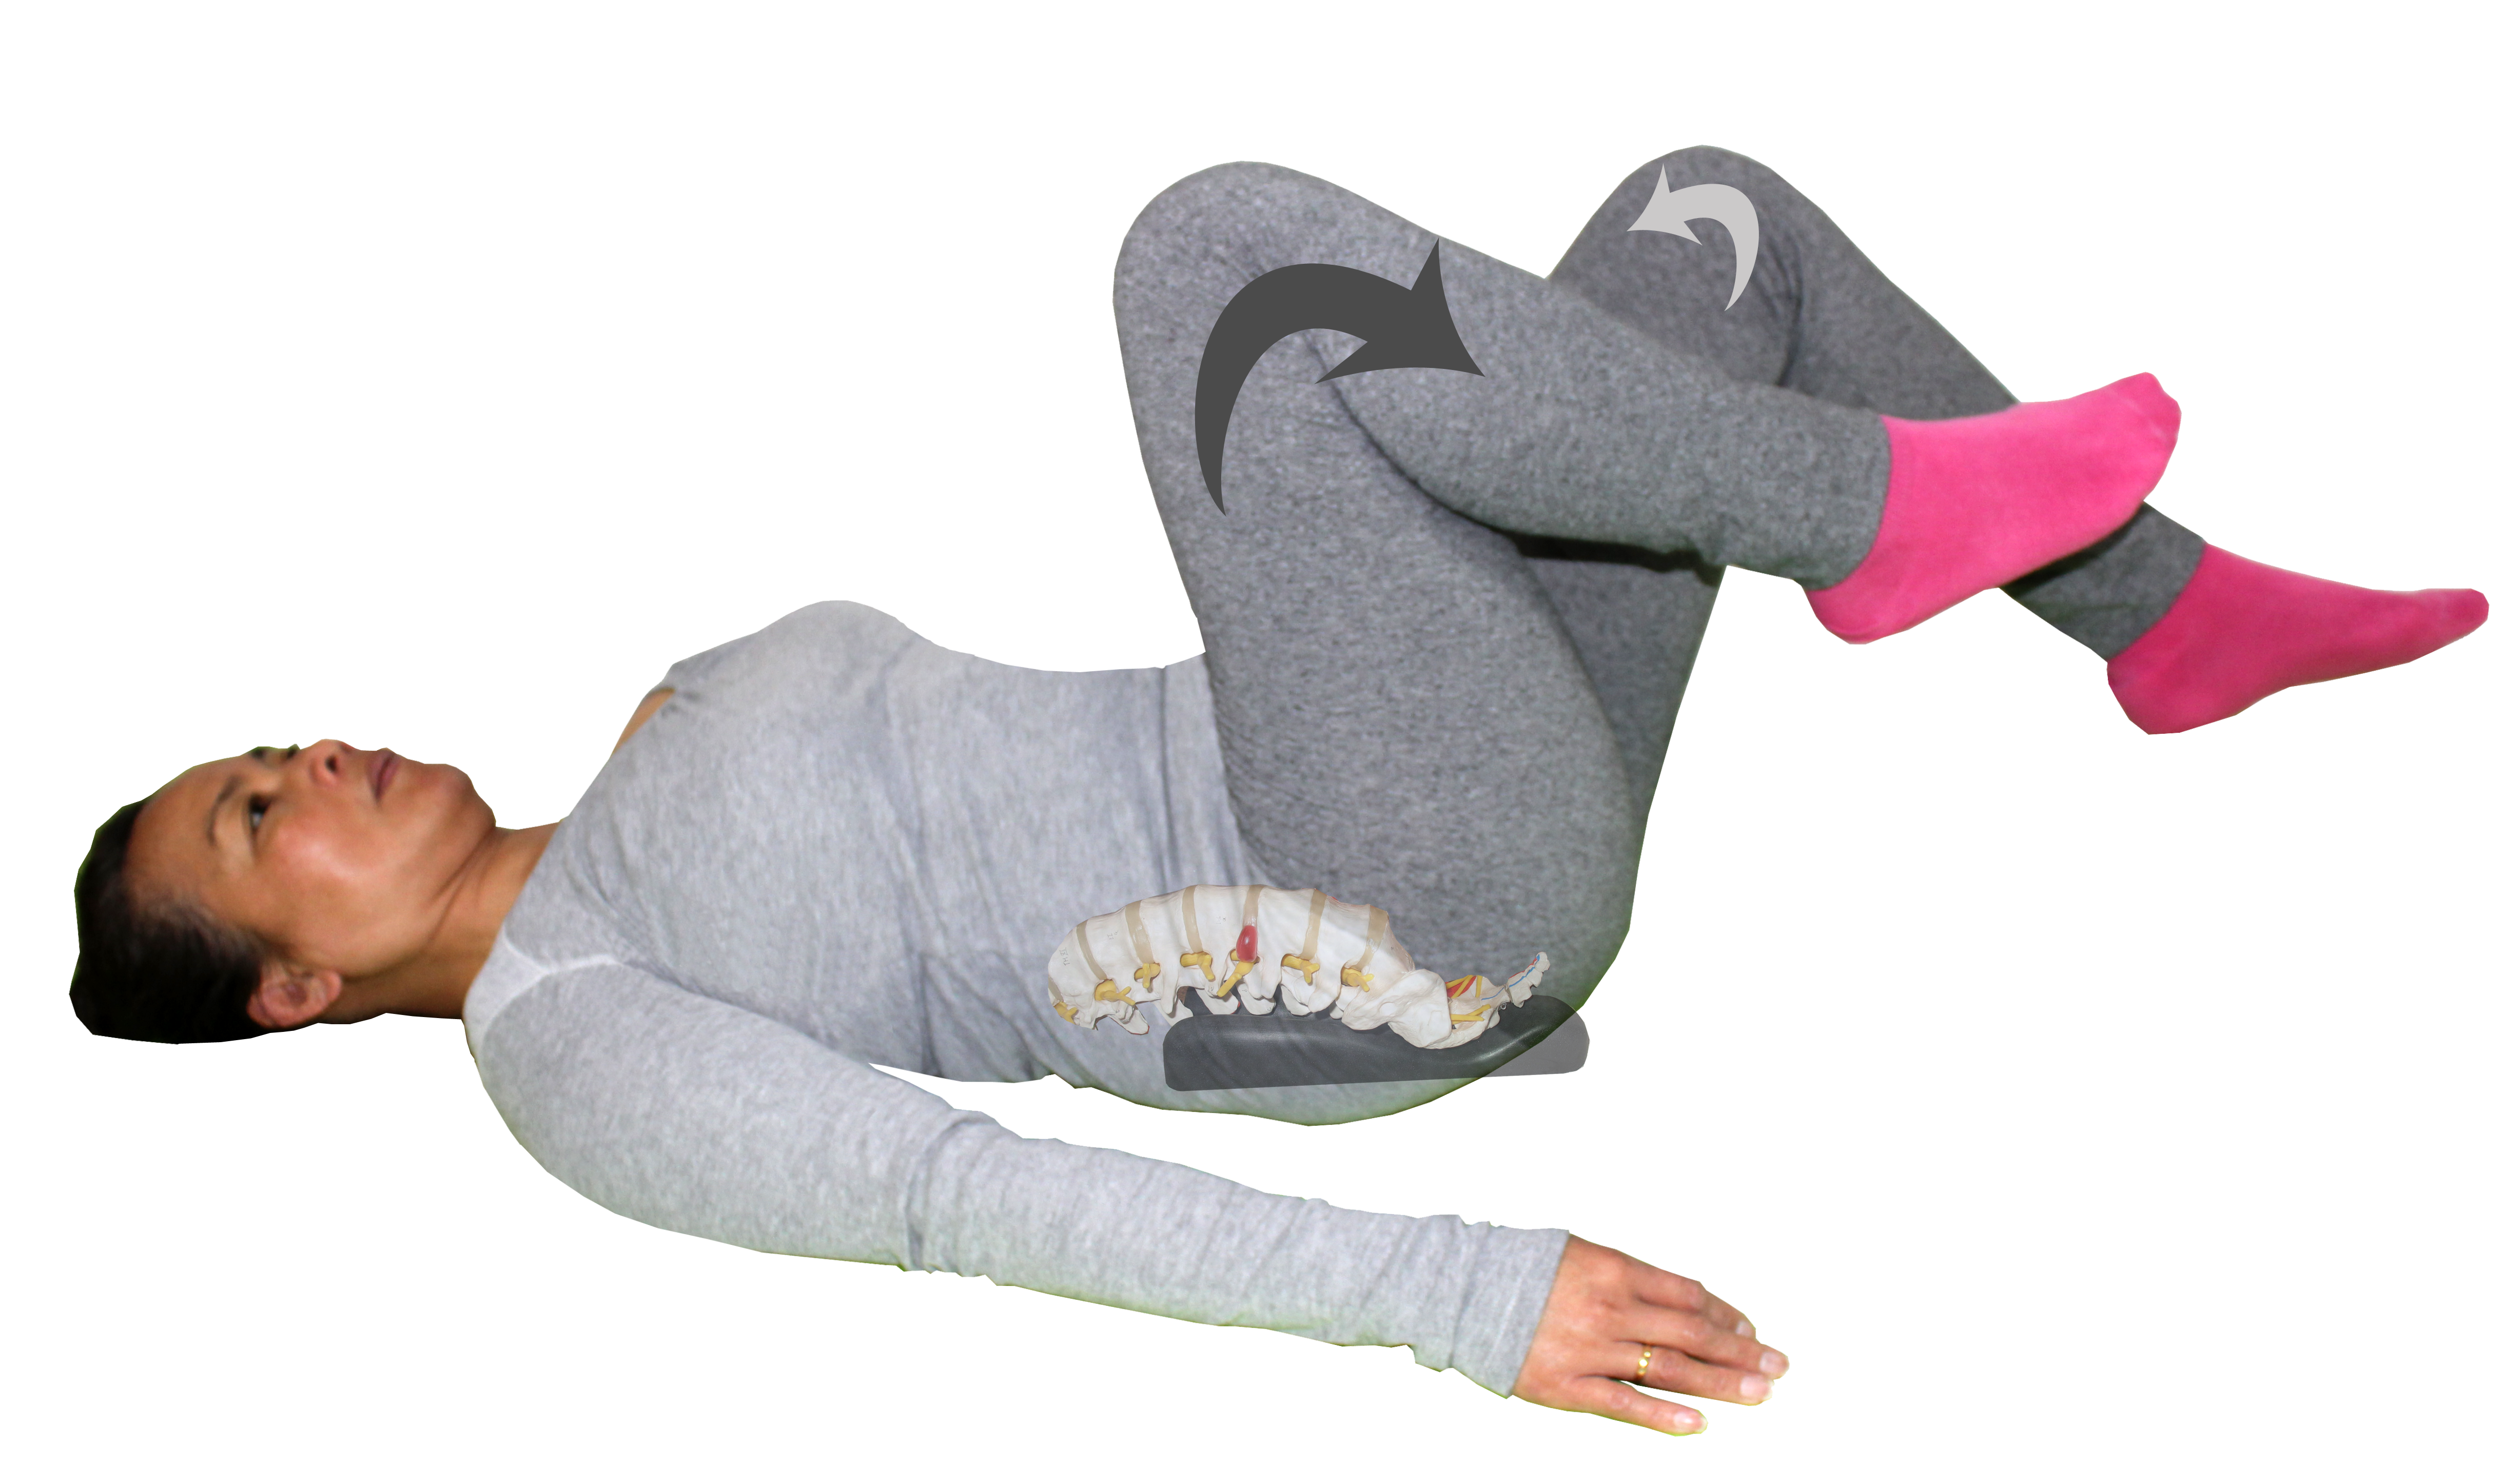

Repeat these movements up to 3 times !

Spinal Decompression
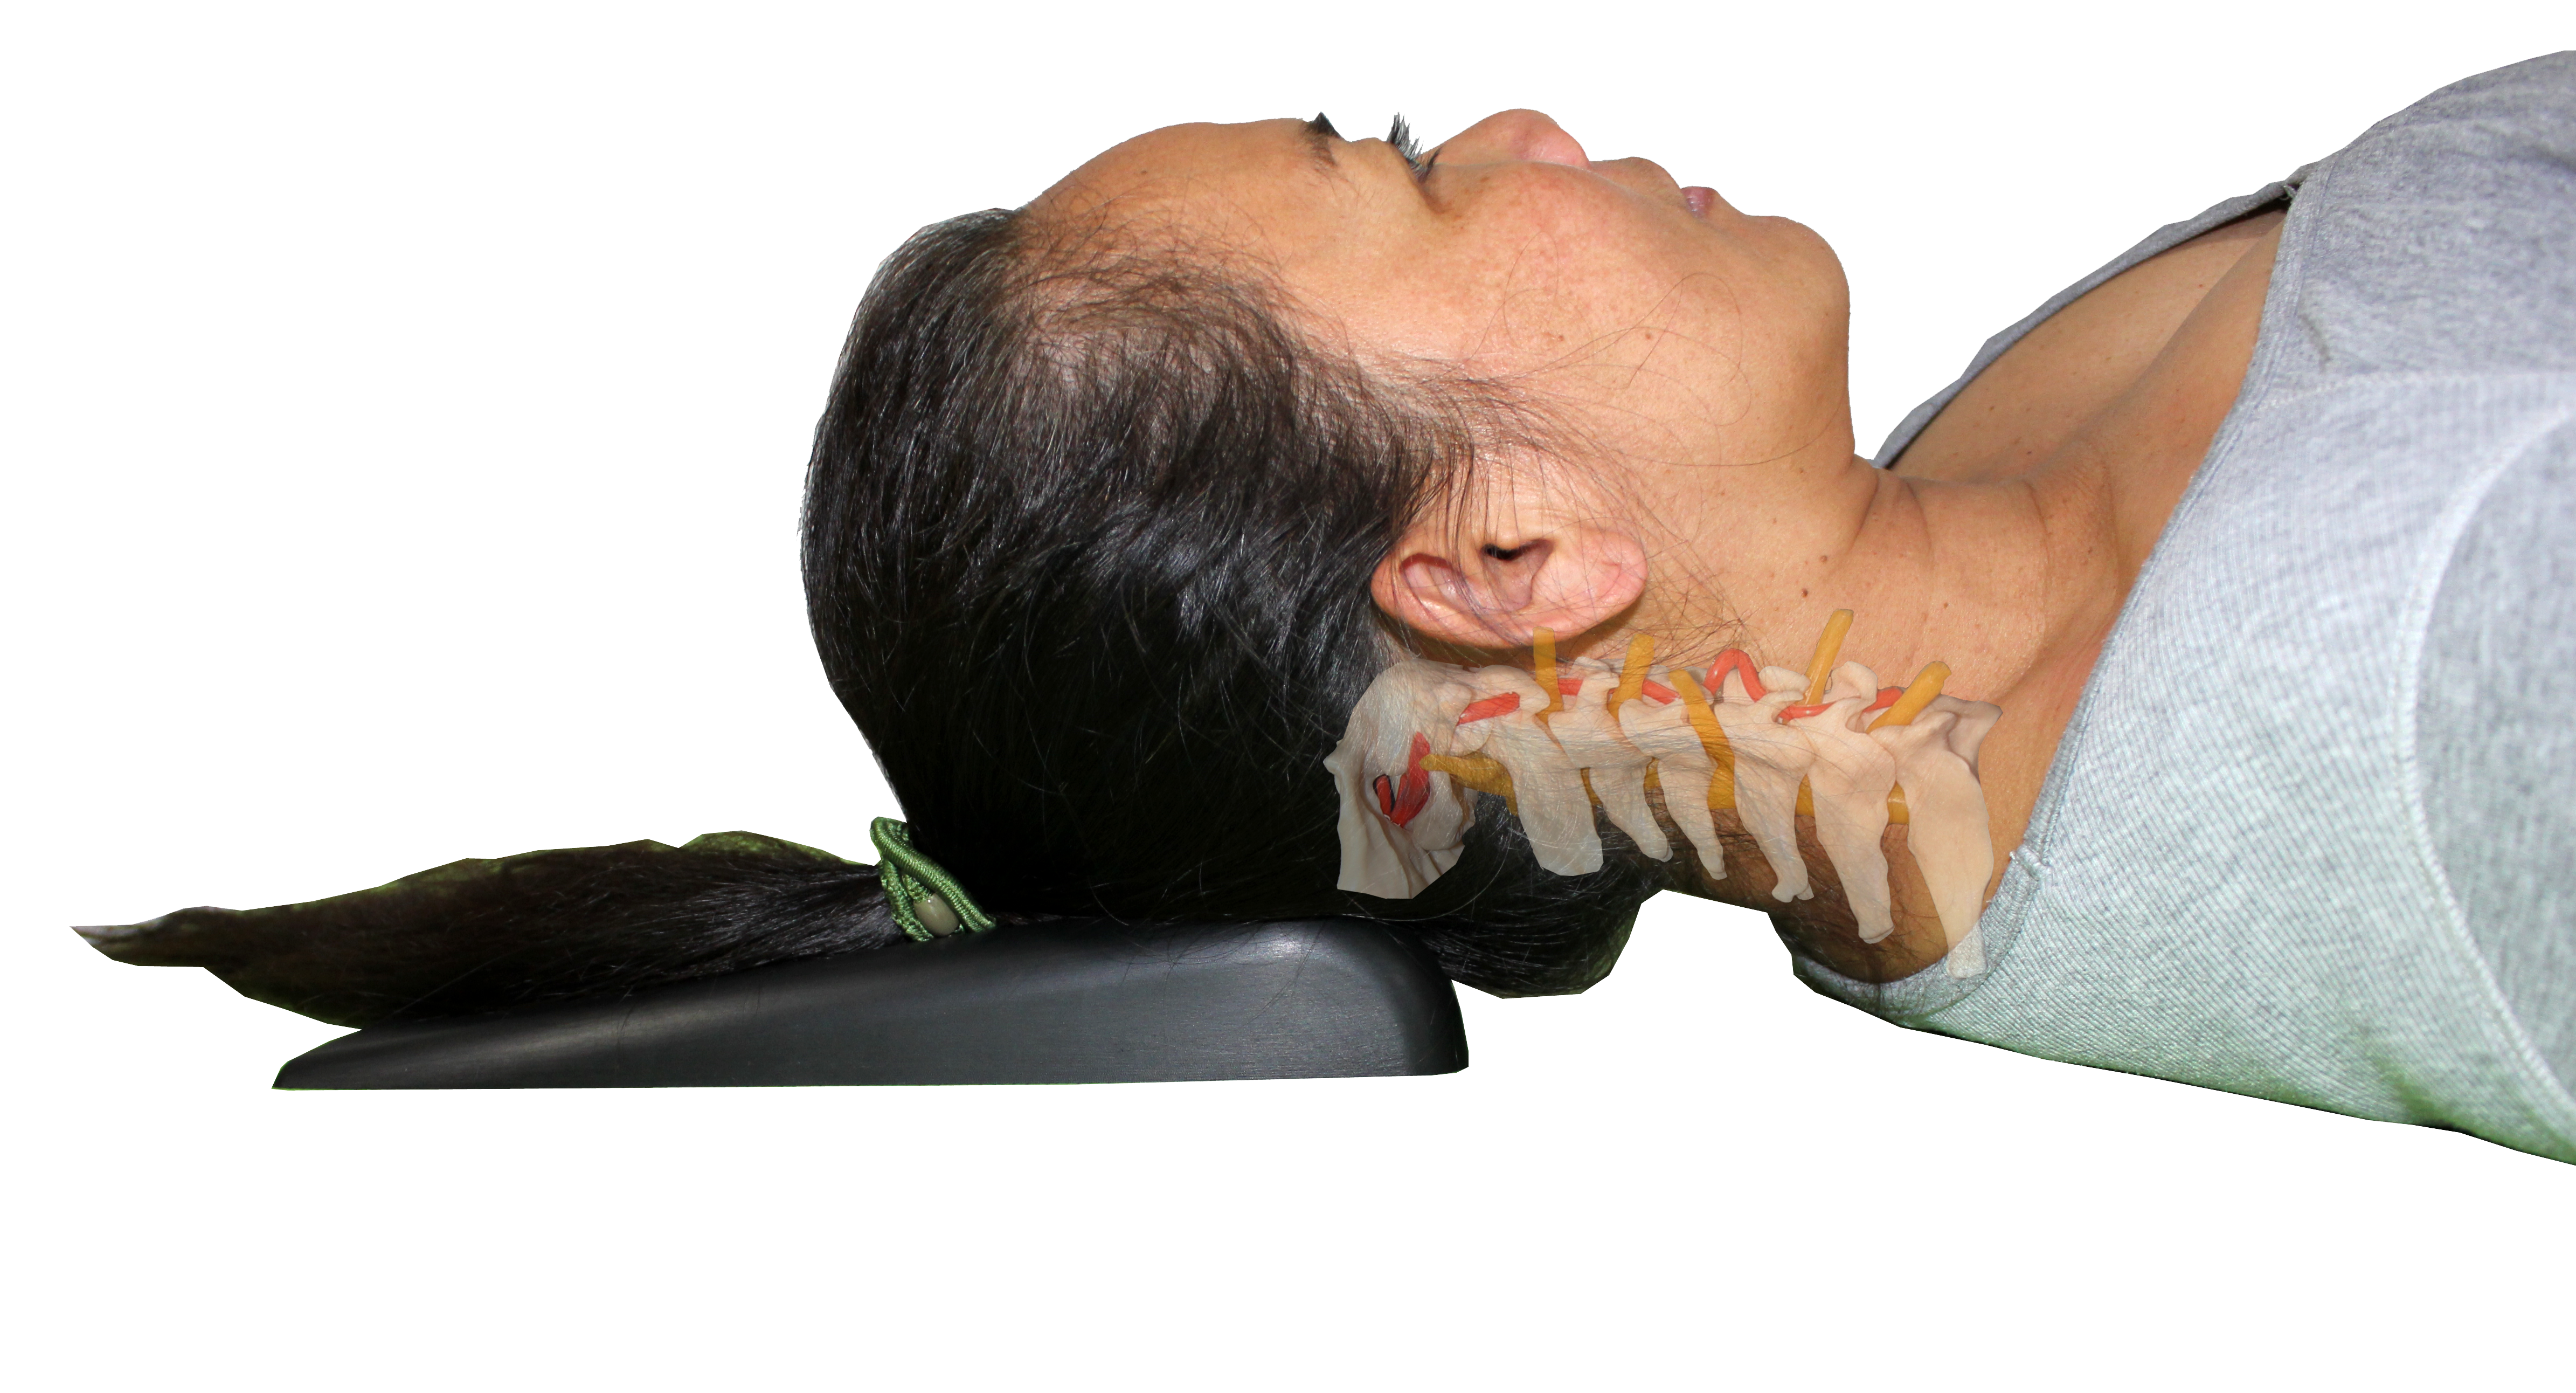
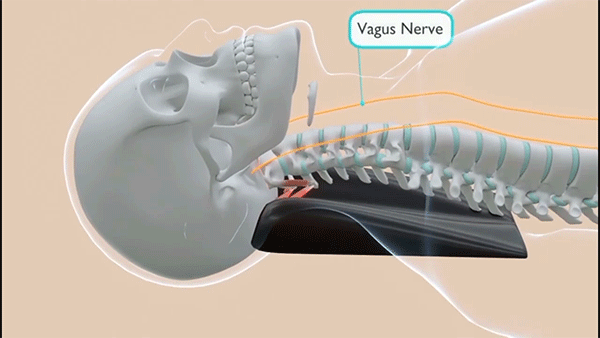
The Sacro and Spine Aligners can be used to achieve an active but gentle decompression of the lumbar (lower back) and the cervical spine (neck)
Dynamic Spinal Decompression:
Lumbar decompression:
1. Find the correct position
2. Rest for 1 or 2 minutes
3. Enjoy the decompression
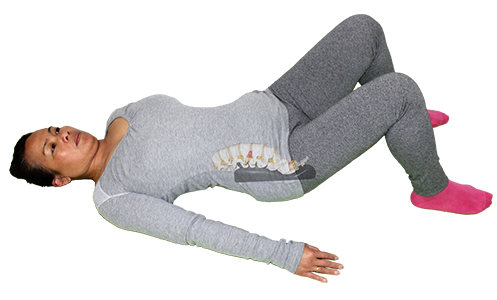
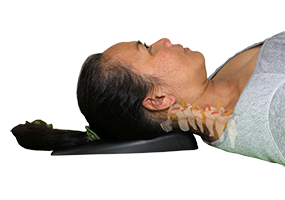
Sacrum Position:
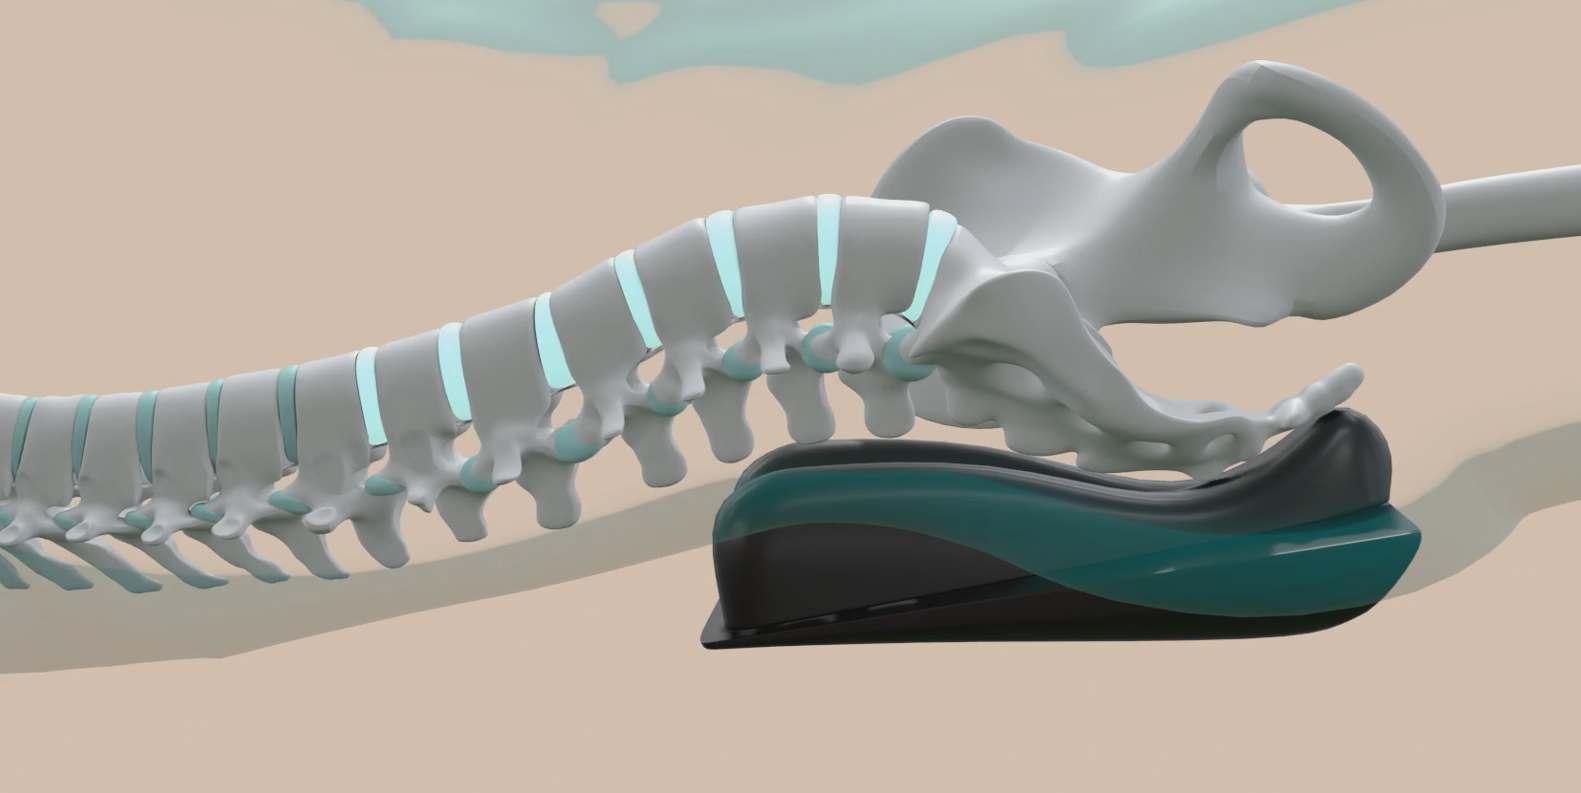

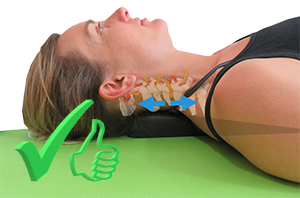
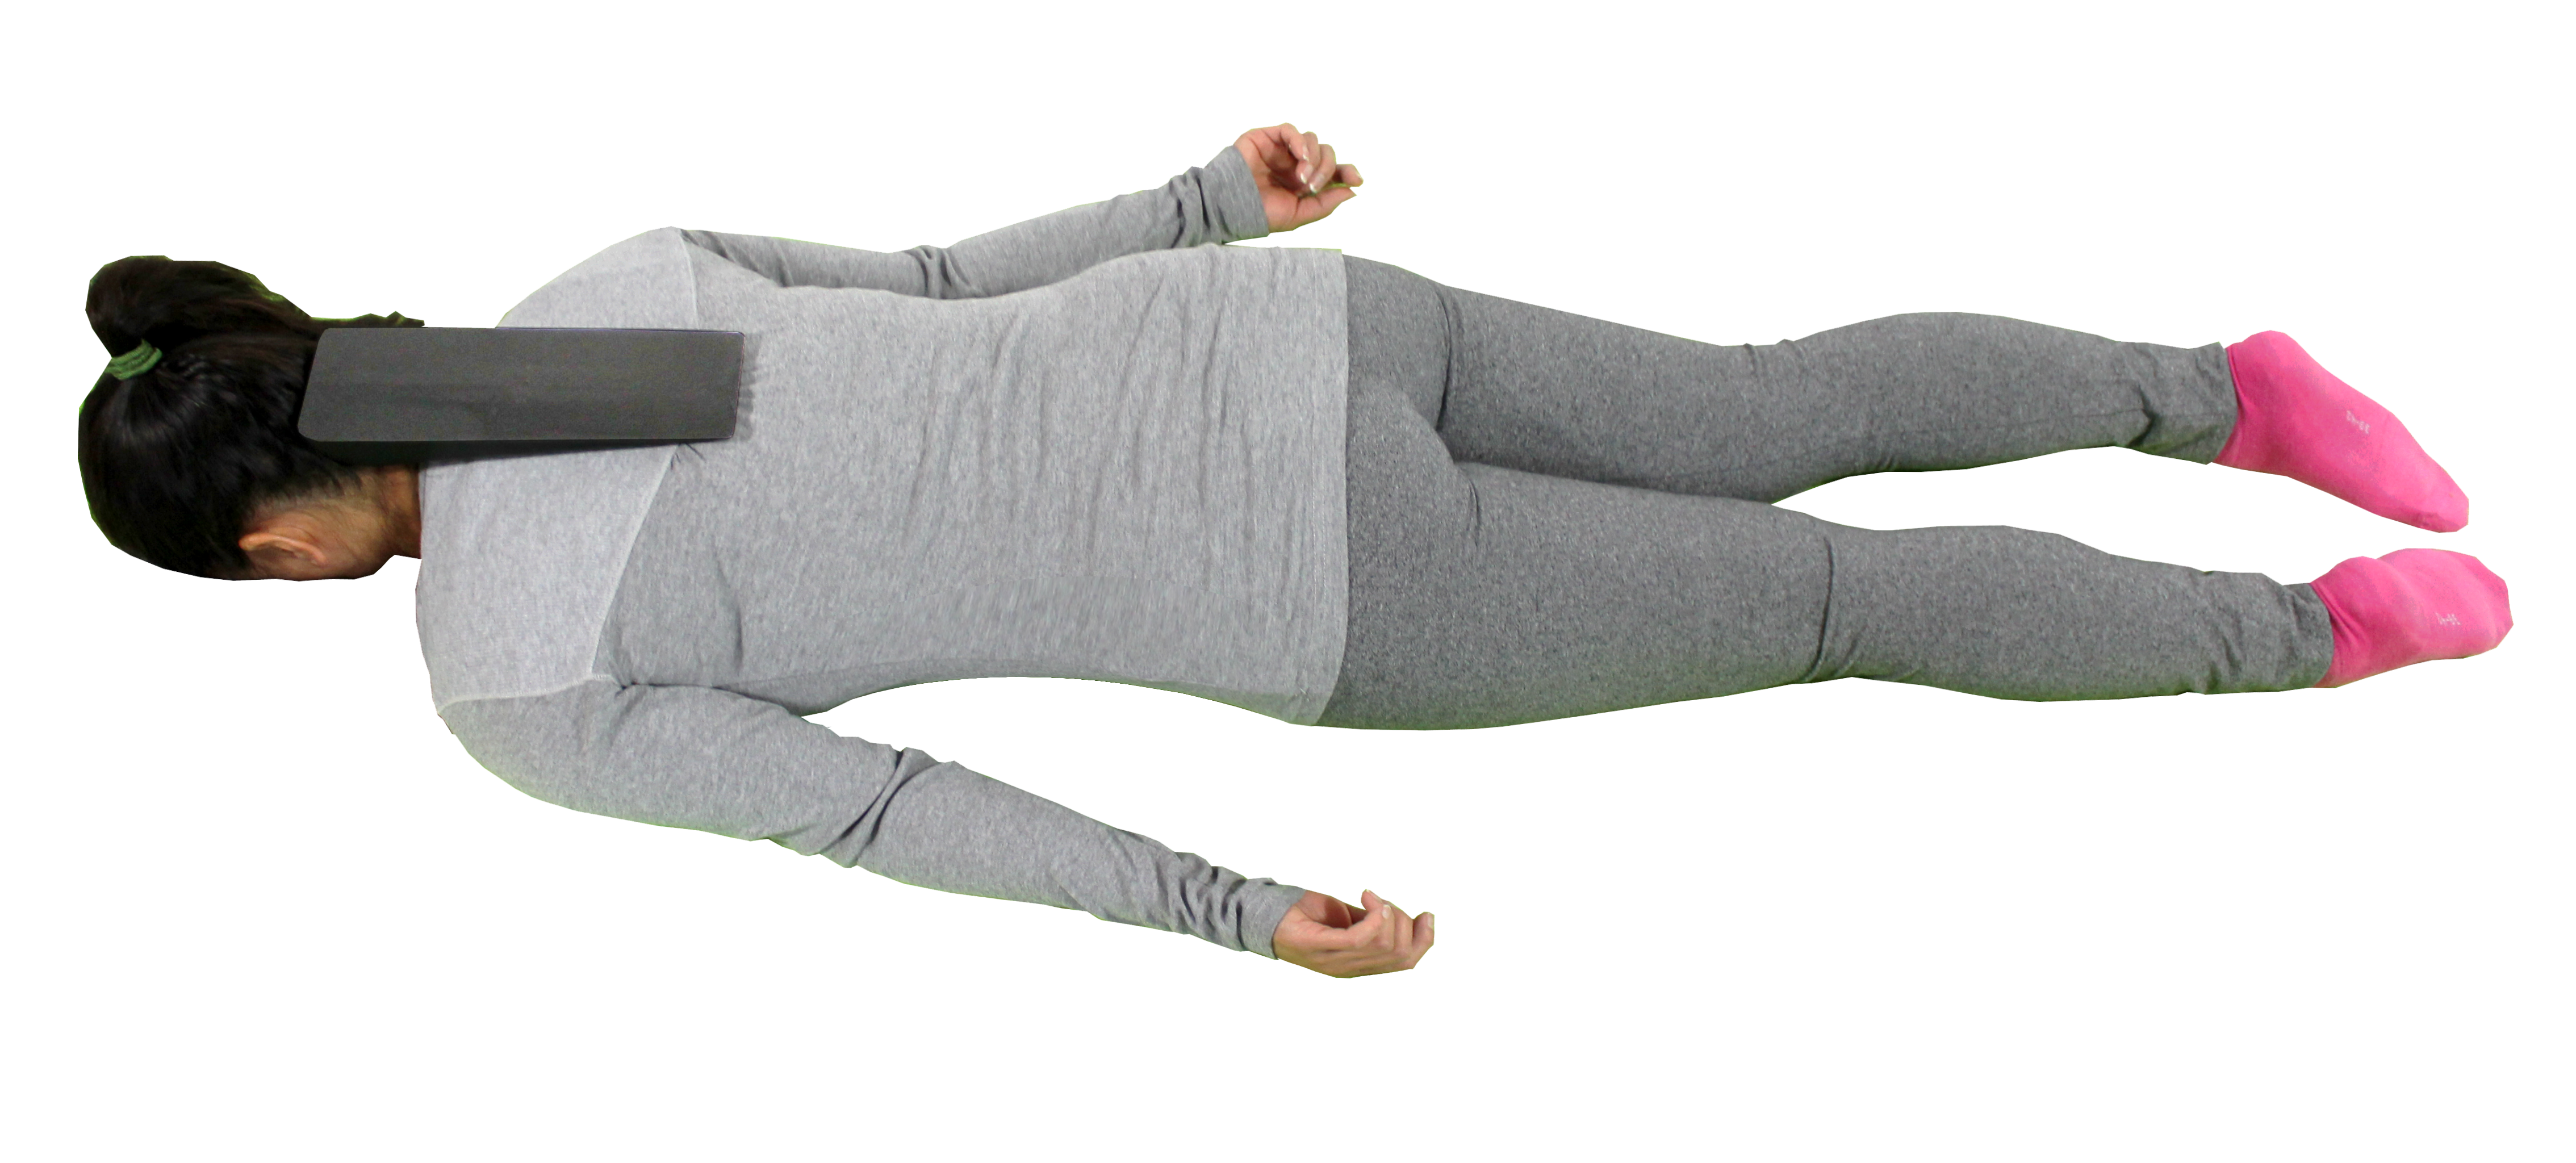
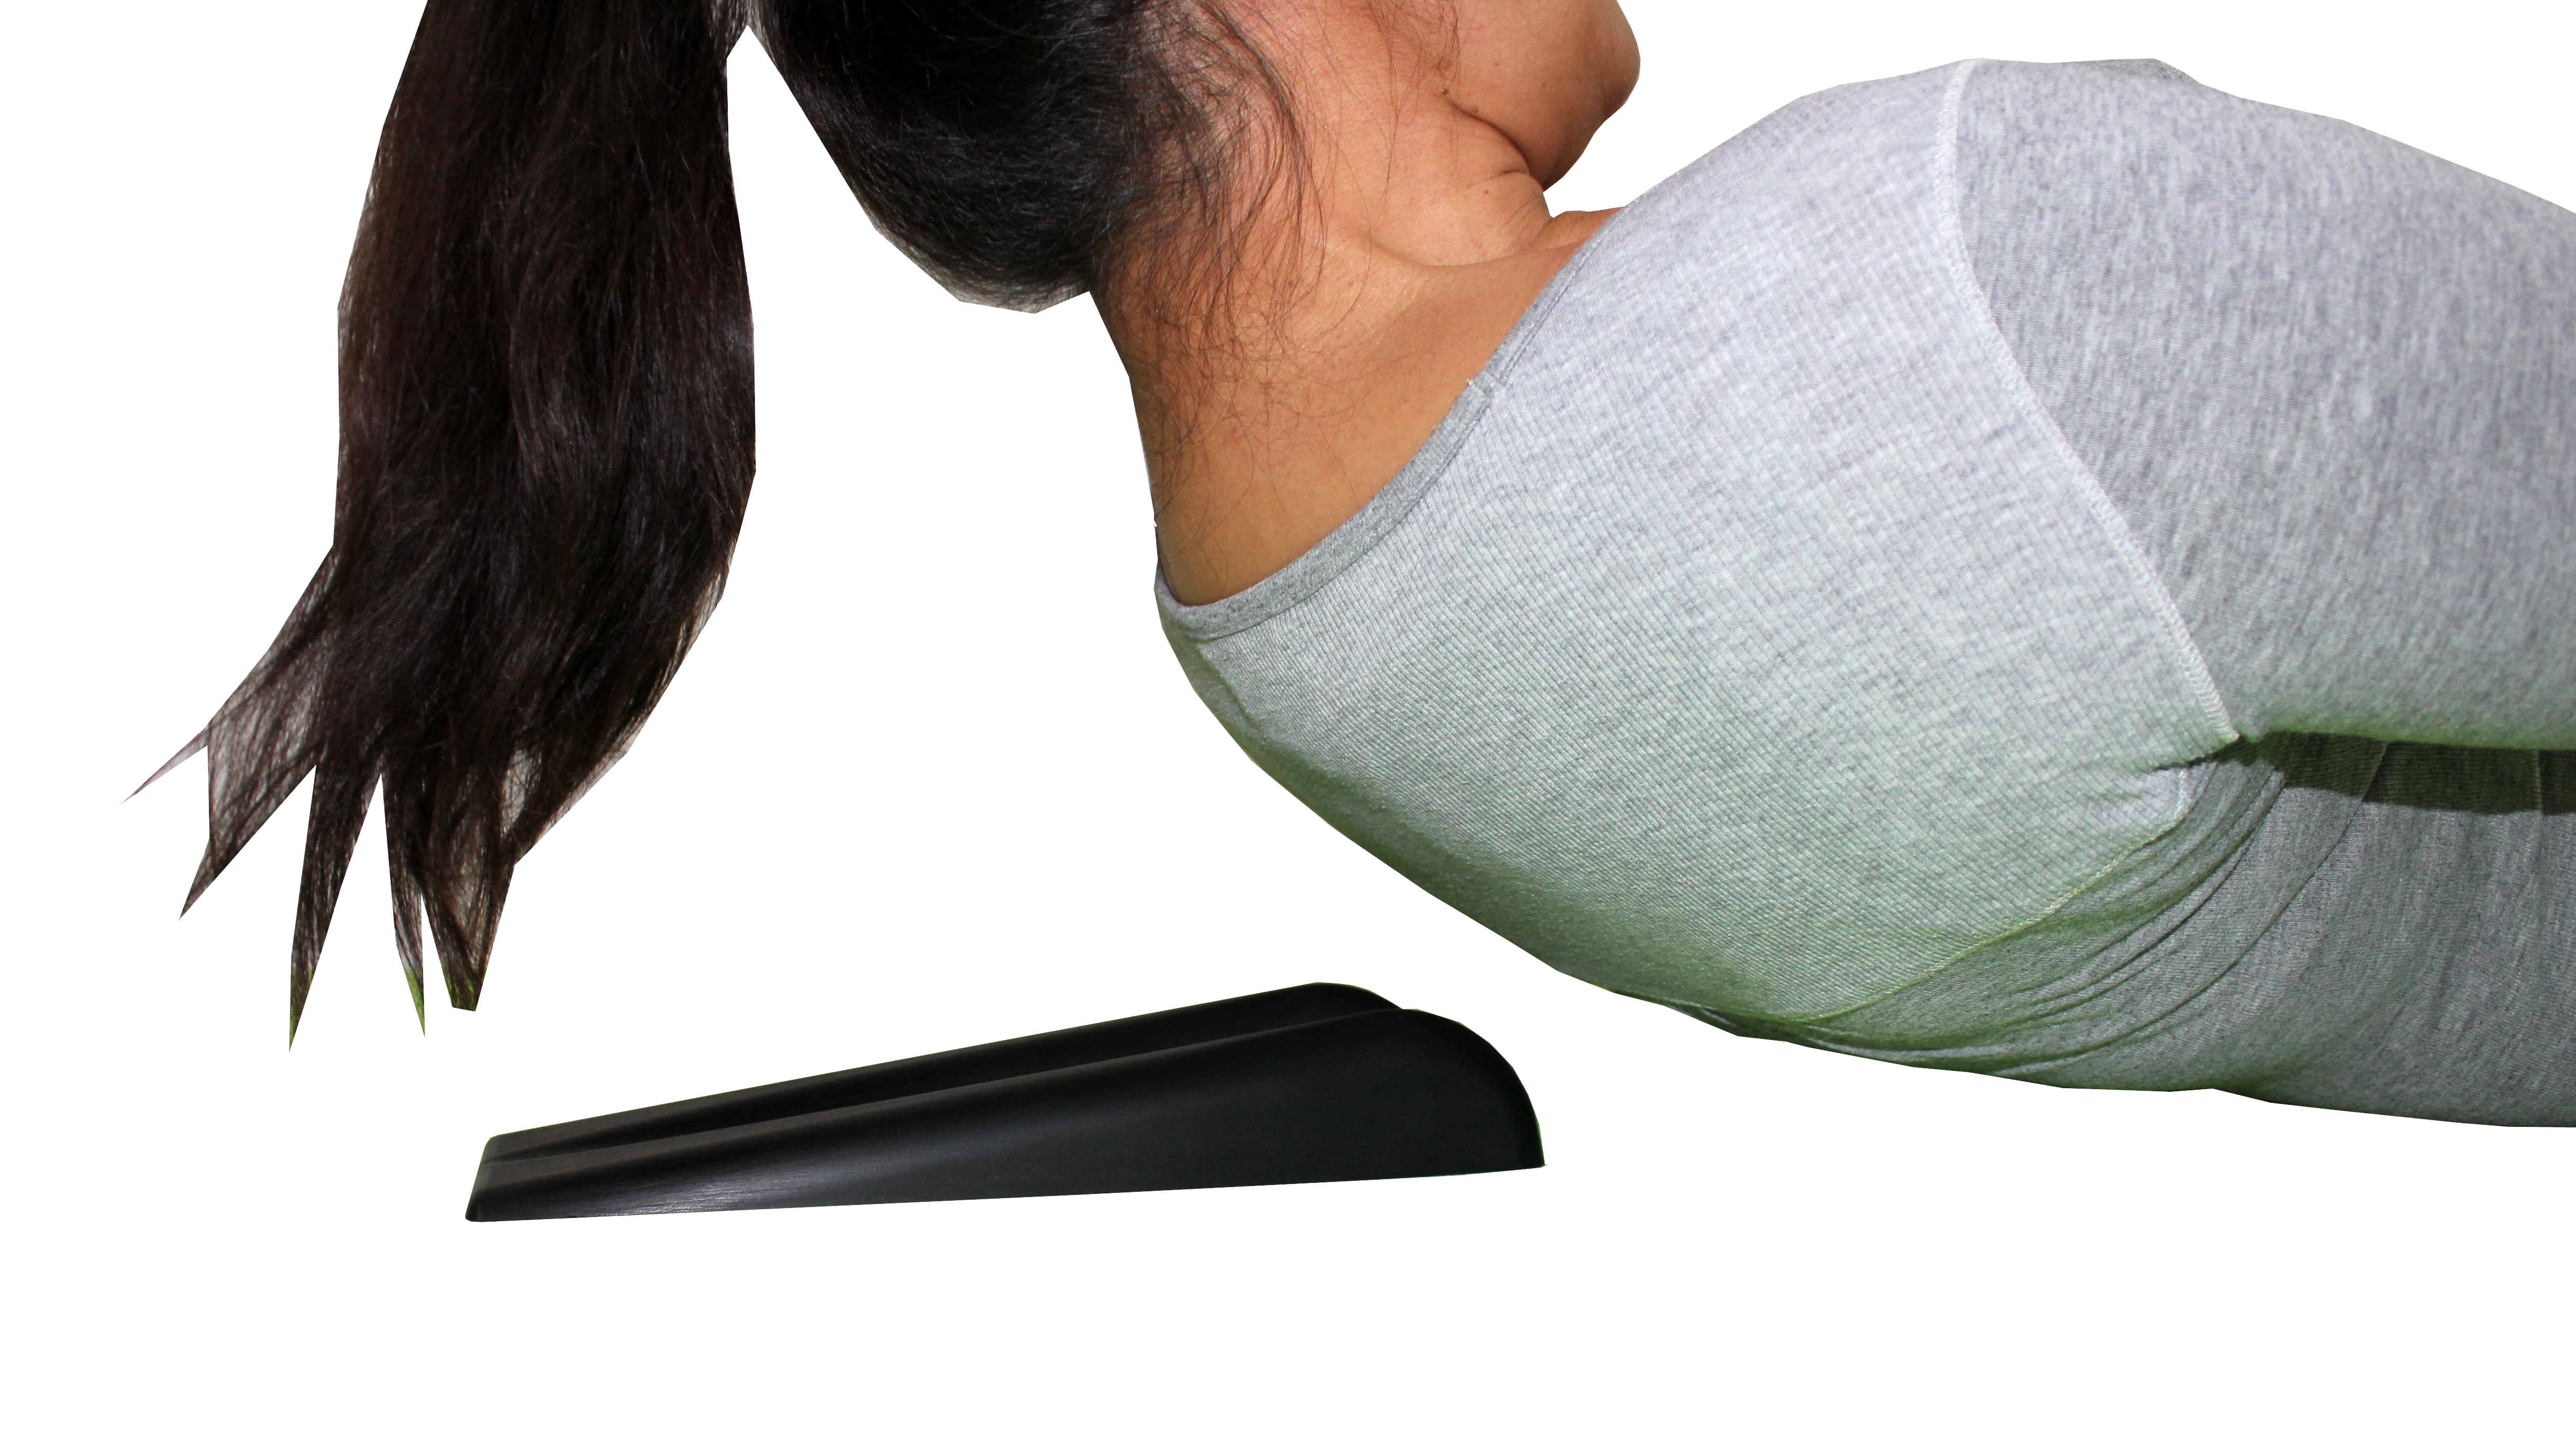
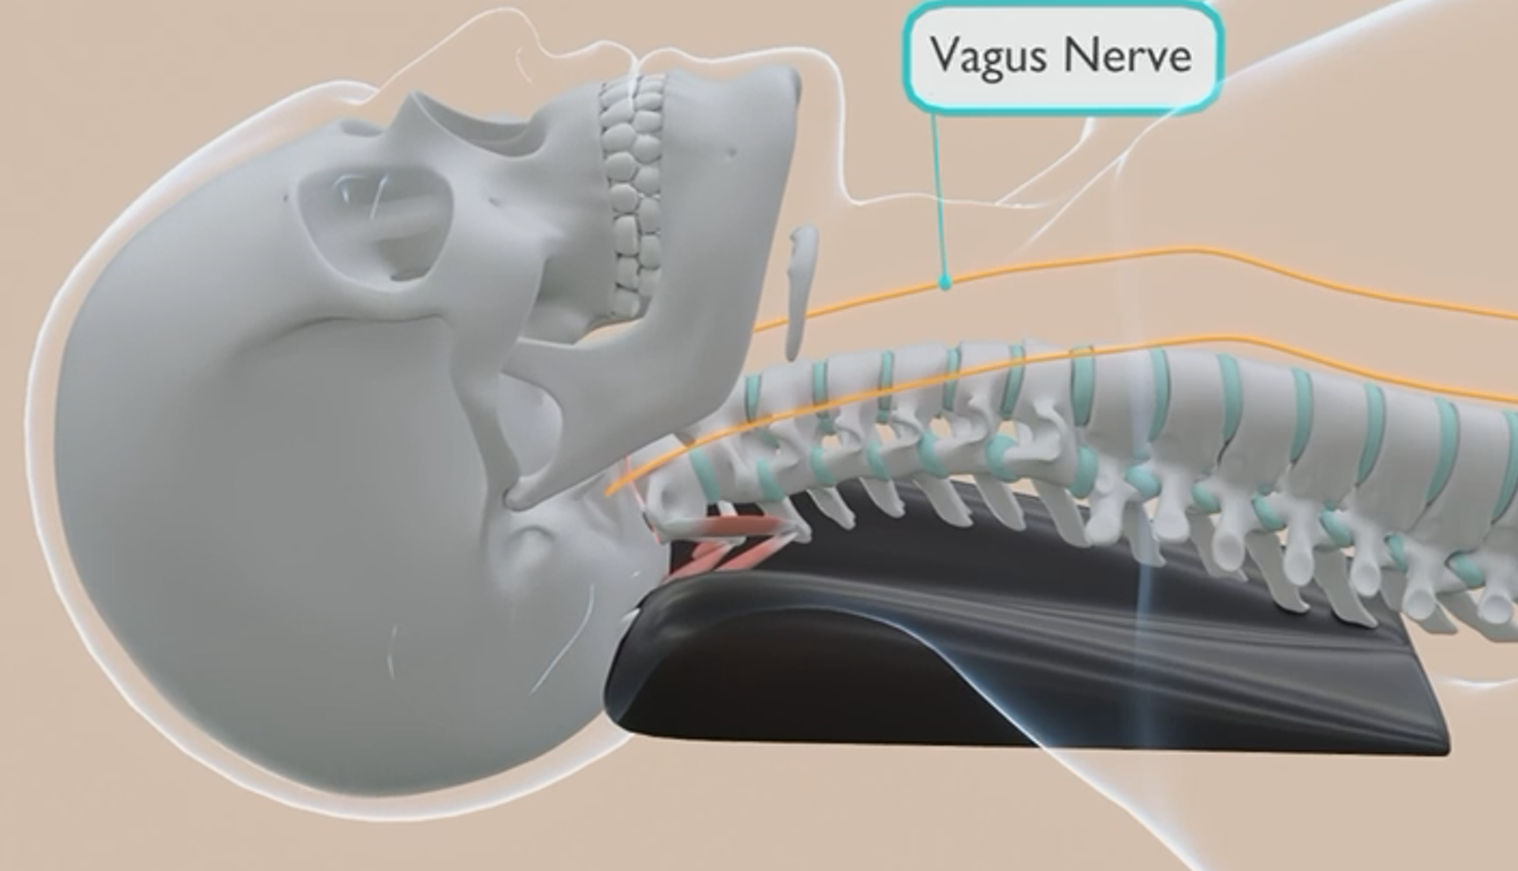
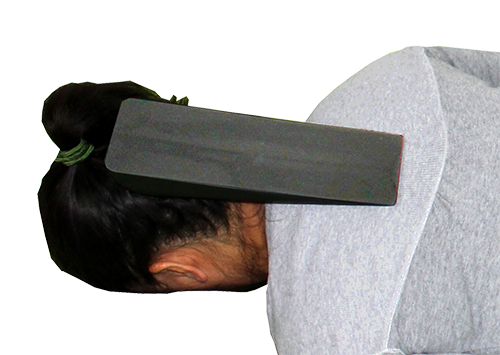
Neck decompression:
1. Find the correct position at the base of the scull (occiput)
2. Slowly stretch out legs straight but keep feet on the floor during the movement !
(= sliding downwards, keep socks on or place feet onto a towel)
2. Rest for 1 or 2 minutes
3. Enjoy the decompression
Position:

Movement:

Enjoy the decompression:
Spine Balance
1. Find the correct position
2. Make simple movements (15 seconds each!)
3. Change position to reach next vertebral level
4. Feel the Balance
Spinal column Mobilization and Re-Balancing:
1. Find the correct position
2. Make simple movements (15 seconds each!)
3. Change position to reach next vertebral level
4. Feel the Balance
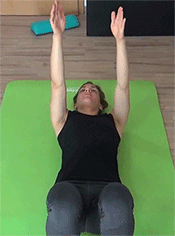
Position:


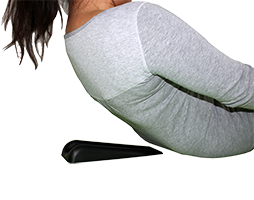
Movements:
1. Move arm (shoulders) up and down

2. rocking body gently upwards-downwards
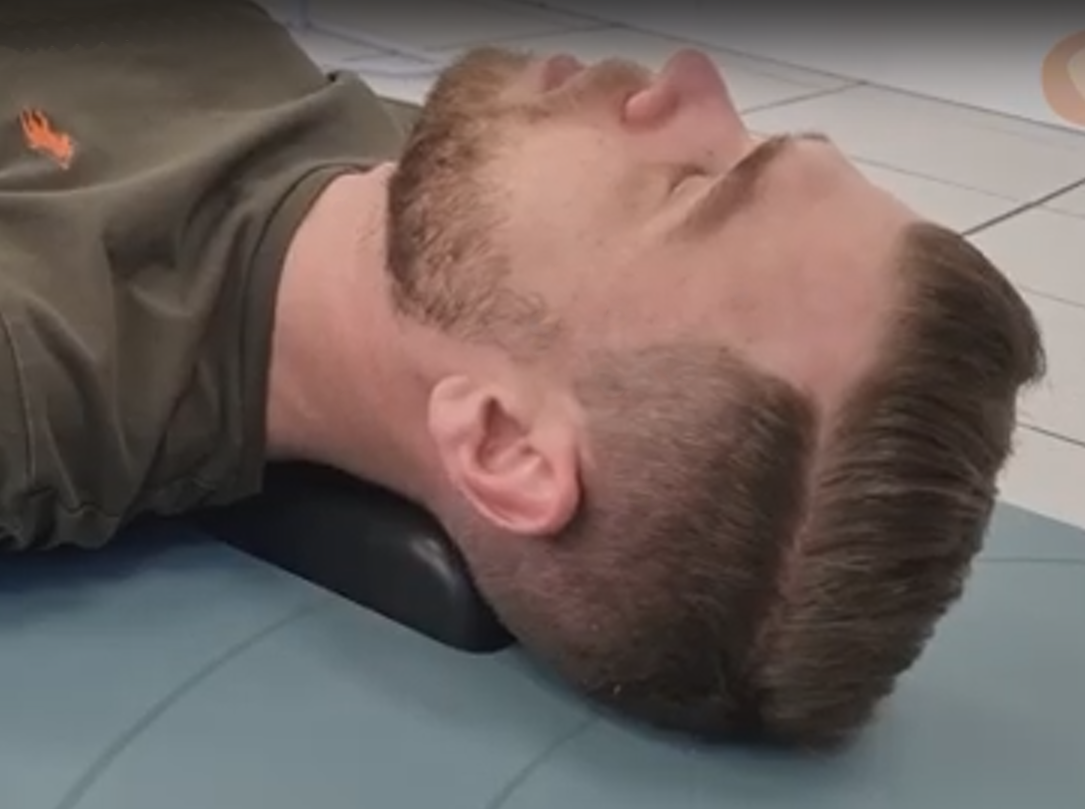
Head / Neck positions
1. Find the correct position
2. Make simple movements with the head (= no-no / yes-yes)
3. Feel the Balance
Neck - Head Mobilization and Re-Balancing:
1. Find the correct position
2. Make simple movements with the head (= no-no / yes-yes)
3. Feel the Balance
Positions:

Movements:
1. side to side (= no-no)
2. nodding head up-down (= yes-yes)

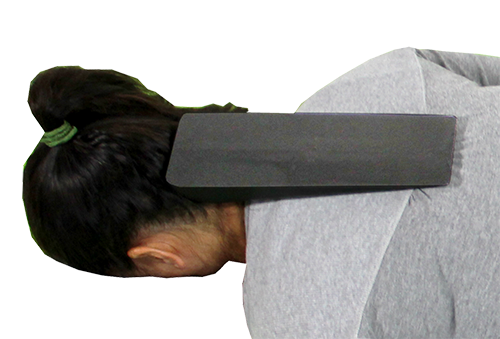
Trigger Point Relax
The head of the Spynamics Sacro Aligner is perfectly designed to relax trigger points in the body.
Simply lean respective body part
onto the tool and move the body carefully.
Trigger Point Relaxation:
1. Find the correct position
2. Make simple movements
3. Feel the Relaxation
Positions:

Movements:
1. Put body weight onto the head of the Sacro Aligner
2. Move the body carefully
» Note: Always stay relaxed and breathe normal .
Do not exercise if it is too uncomfortable or causing pain!
Caution: At the end stand up slowly and careful to avoid dizziness!
Caution: During the first few days using this tool the body may show some adjustment reactions which can occasionally be a little unpleasant. This is usually a healing reaction and should be gone latest after one week. If you are not sure about these reactions please consult your doctor first before you continue the exercises.
Caution: Do not use this tool in cases of recent accidents, severe osteoporosis, high fever, acute stroke, acute heart trouble cerebral hemorrhage, cerebral aneurysm, brain and spine tumors.
If you suffer from any other serious health condition check with your physician or a professional health care provider first before using this tool
Join the SPYNAMICS Newsletters
Subscribe to our mailing list to receive updates and promotional offers.
to: info@spynamics.com